Wednesday 30 January 2019

Book box

Hello Crafty Peeps!!

Good morning......
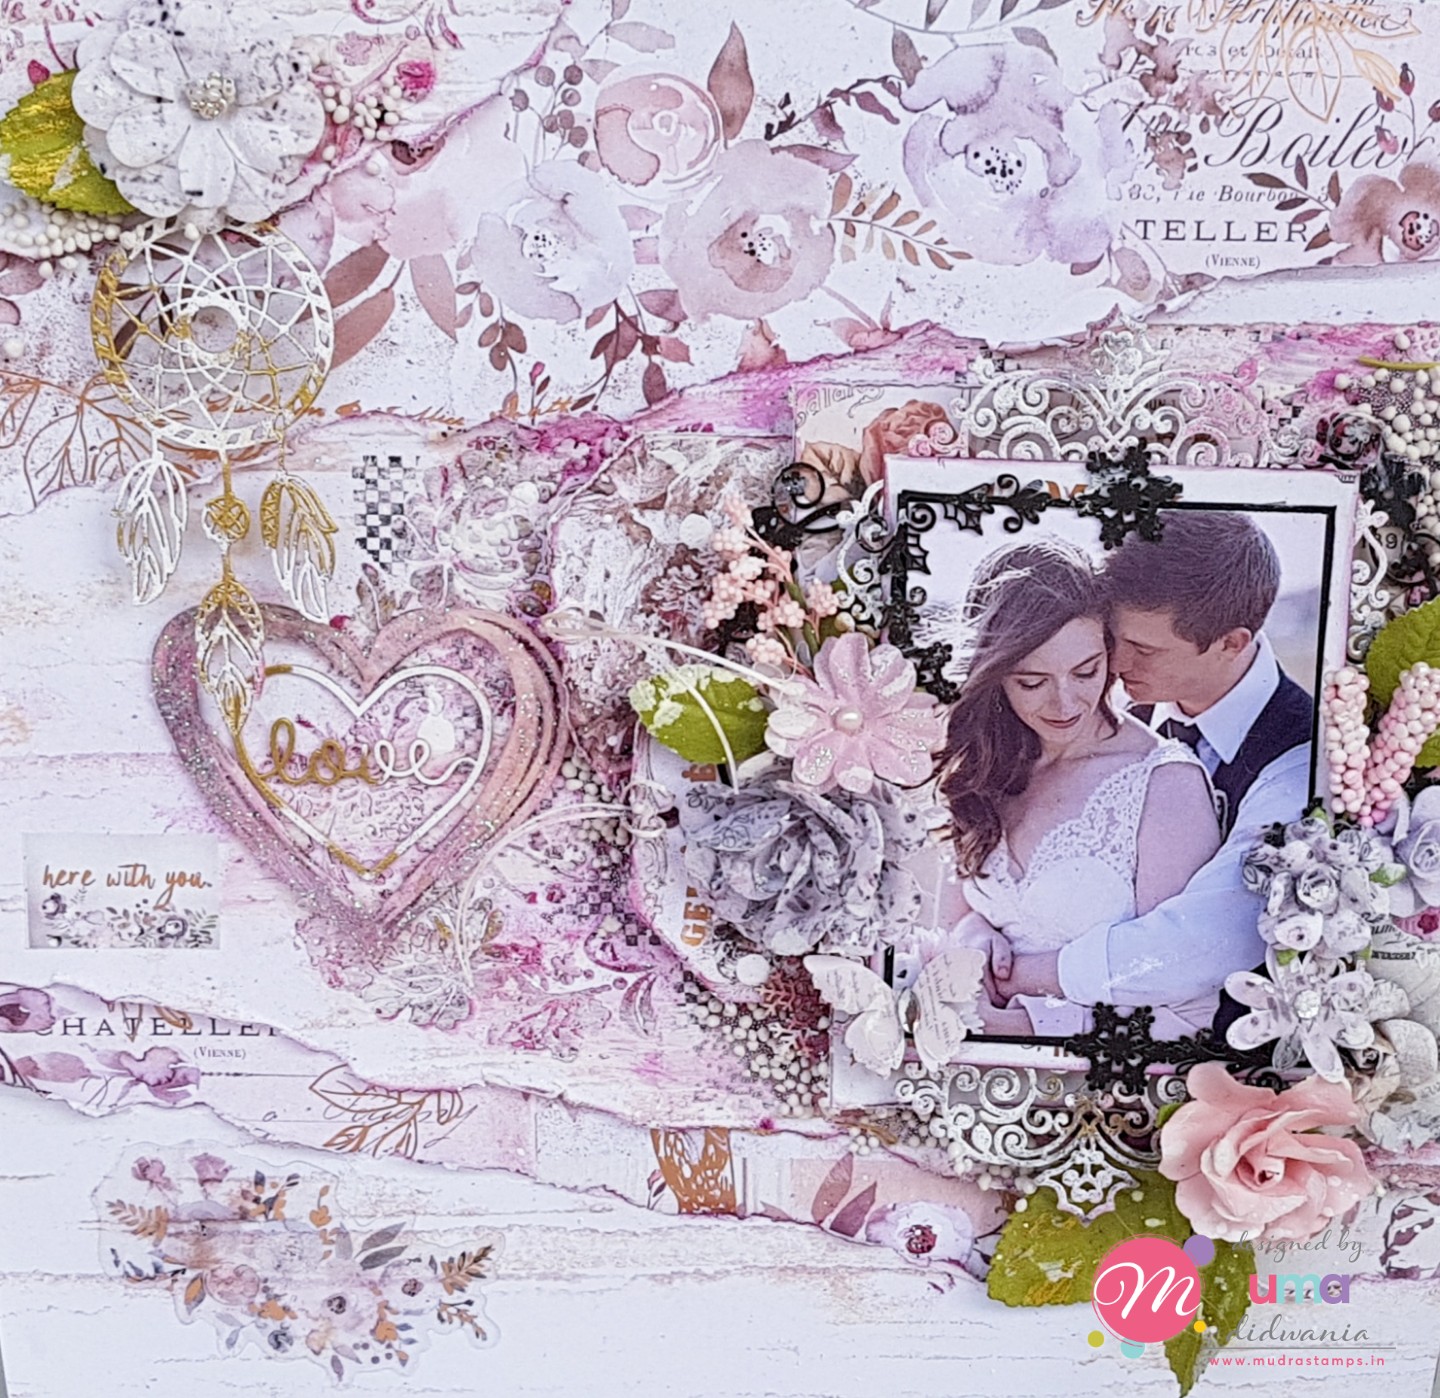
Today is the last wednesday of the month and Heartfelt Creations launched some new dies. Yes! you hear right. These are Diamond dies. Here I created a book box using these beautiful dies.


HC Products:
Magenta Hue Archival
Olive Green Archival
Leaf Green Archival
HCDP1-298 Tulip Time Paper Collection
HCD1-7203 Ornamental Tags Die
HCD1-7201 Tickets And Tag Die
HCD2-7191 Intricate Swrils Frames die
HCD1-7193 Leafy Accents Die
HCD2-751 Cut Mat Create 2A die
HCD1-734 Sun kissed Fleur Die
HCFB1-467 3D Leafy Accents Shaping mold
HCPC-3835 Leafy Accents Cling Stamp
HCPC-3533 Sun Kissed Fleur Stamp
HCD1-7226 Diamond Basics Die
HCD1-7227 Eyelet Diamond Die
HCD1-7228 Lacy Diamond Die
HCD1-7229 Diamonds & Lace Die

Other Products:
White cardstock, vintage photo distress oxide,  satin cord , satin ribbon, handmade flower making paper, groove tool,

Video Links:

Instructions:
Ready book box measures 5.5”×7.5”×2” .
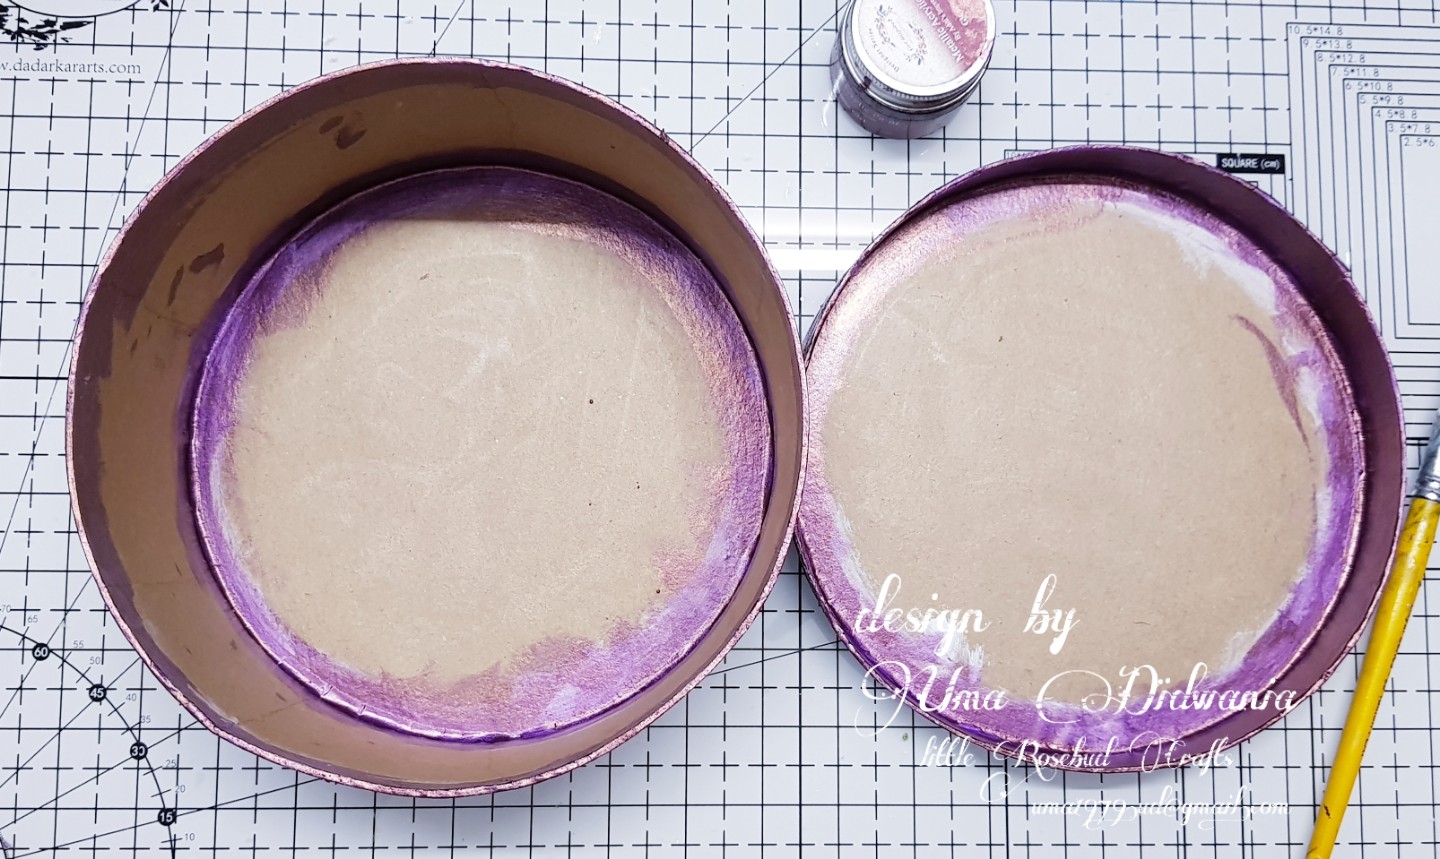
Take two pieces of off white cardstock measuring 7”×12” and two piece measuring 5”×12”. Score on every half inch from the smaller side of all four pieces. Fold the score lines and create zig zag pattern. Join all the four pieces and create a frame.  Distress the edges of the frame using vintage photo distress oxide. Cut two pieces of thin chipboard measuring 5.5”×7.5”. Also cut a piece of cardstock measuring 2”×7”. Glue all three pieces on the white cardstock and create a cover like a scrapbook. Glue the frame before we created with the cardstock inside the cover. Distress the edges of the cover. Glue satin ribbon and satin cord on the book cover to tie the book. Choose pattern paper from designer paper collection and cut two piece measuring 5 4/8”×7 4/8” and a piece measuring 1 7/8”×7 4/8”. Layer it on the outer side of the book cover. Choose another pattern paper from the same collection and cut two pieces measuring 5.25”×7.25”. Matt it on the both side of the outer cover. Also, cut a piece from the same paper measuring 3.25”×7.25”. Score the lines on the pattern paper and glue it on the side edge of the book cover.

Cover the inside book cover and box using pattern paper. Cut a border from the same collection and matt it on the inside box as shown in the picture. To decorate the book cover cut a frame from the white cardstock using Intricate Swrils Frames die. Cut a border from the pattern paper and glue it on the frame as shown in the picture. Matt the frame on the book cover in a tilted manner. Cut some pieces from the pattern paper and white cardstock using diamond dies and matt it on the one side of the frame using dimensional tape as shown in the picture. Cut a border using cut mat create 2A die and glue it on the side of the book cover.

Stamp sun kissed fleur flower using magenta hue ink on handmade flower making paper and cut with coordinating die. Paint the flowers using same ink and shape them using groove tool. Stamp the leafy accent leaves on the white cardstock using olive green ink. Paint the leaves with leaf green and olive green ink and cut with coordinating die. Shape the leaves using 3d shaping mold. Glue the flowers and the leaves using hot melted glue as shown in the picture.

Cut a two tags from the pattern paper using ornamental tag die and attached it with satin cord. Also, attach two pearls with the cord and tie the cord on the side of the book. Cut five pieces of sentiment from the white cardstock using ornamental tag die. Layer all the pieces to create dimensions. Glue the sentiment on the book cover. Cut white cardstock and pattern paper using Lacy Diamond die. Glue it inside the box. Also glue leaves and flower as shown in the picture. Cut a sentiment ticket from the same collection and glue it inside the box.

Thanks for stopping by
Regards
Uma

Wednesday 23 January 2019

Sunny Belated Birthday

Hello Folks!!

How are you? It's Heartfelt wednesday and it's time to get inspired. Today I have a beautiful card with sunflowers and vellum butterfly to share with you. I hope you like this card.


HC Products:
HCD1-7213 Elegant Pocket Accents Die
HCD1-7201 Tickets And Tag Die
HCD1-7193 Leafy Accents Die
HCD1-7178 Fluttering Butterfly Die
HCD1-7154 Eyelet Circle & Basics Small Die
HCD1-734 Sun kissed Fleur Die
HCPC-3824 Fluttering Butterfly Stamp
HCPC-3533 Sun Kissed Fleur Stamp
HCPC-3835 Leafy Accents Cling Stamp
HCDP1-291 Sweet As Honey Paper Collection
HCFB1-467 3D Leafy Accents Shaping Mold
Library Green Archival
Sap Green Archival
Sunflower Yellow Archival

Other Products:
White cardstock , white embossing powder,  versa mark,  glitter , micro beads , sunflower glass fragments , hand made flower making paper, vellum paper, forslised amber distress oxide,  broken china distress oxide.

Instructions:
Ready top side fold card measures 6”×8” .
To prepare the card mats first choose a pattern paper from the designer paper collection and cut a piece measuring 7 7/8”×5 7/8”. Distress the edges of the pattern paper using same color ink and layer it on the ready card base. Further choose two pattern paper and cut a piece measuring 5.75”×7.75”. Distress the edges of both the paper using same color ink. Matt one piece on the ready card base.

Cut two borders from the white cardstock using Elegant Pocket Accents Die. Also cut the edges of the pattern paper using same die. Apply glitter on the borders and glue the borders on both edge of the pattern paper. Layer it on the card base using dimensional tape. Cut four rings from the white cardstock using eyelet circle &basic small die. Glue the rings on the center of the card.

Stamp sunflower on the handmade flower making paper using sunflower yellow archival and cut with coordinating die. Paint the flowers with the same color ink and shape using  groove tool. To create flower center I use sunflower glass fragments. Stamp the leafy accents leaf using library green archival on white cardstock and cut with coordinating die. Paint the leaves  using sap green and library green archival. Shape the leaves using shaping mold. Stamp butterfly on the vellum paper using versa mark and heat embossed with white embossing powder. Cut with coordinating die. Paint the butterfly with distress oxide.

Arrange the flowers and leaves in the center of the card as shown in the picture. Fill the ring with micro beads. Glue the butterfly as shown in the picture. Cut a sentiment from the same collection. Cut white cardstock using tickets and tags die. Glue the sentiment on it.

Would love to hear from you
Love
Uma

Floral Display

Hello Everyone!

Here is my inspirational post using tulip time collection.


HC Products:
HCD1-7213 Elegant Pocket Accents Die
HCD1-7203 Ornamental Tags Die
HCD1-776 Eyelet Oval Die
HCD2-751 Cut Mat Create 2A Die
HCD1-7118 Delicate Border Basics Die
HCD1-7119 Classic Border Basics Die
HCS1-459-3 Assorted Beads Stamens-Medium
RACP482 Olive Green Archival
RACP436 Leaf Green Archival
RACP499 Plum Archival
RACP663 Tea Rose Archival
RACP468 Black Archival
478455 Zig Markers
HCD1-7218 Tulip Time Die
HCD1-7219 Tulip Bouquet Die
HCD1-7220 Tulip Vase & Fillers Die
HCPC-3858 Tulip Time Cling Stamp Set
HCPC-3859 Tulip Bouquet Cling Stamp Set
HCPC-3860 Tulip Vase & Fillers Cling Stamp Set
HCDP1-298 Tulip Time Paper Collection
HCFB1-472 3D Tulip Shaping Mold


Other Products:
Smooth white cardstock , water color paper,  wink of stella  glitter pen , satin white cord , the secret garden flower making paper, sparkling dust. 

Instructions:
Ready top side fold card measures 9"×6.5"
To create card mat first choose a pattern paper from the designer paper collection and cut a piece which is 1/8 of an inch smaller on all sides from the card base. Layer it on the ready card base. Take another piece of cardstock measuring 9"×6.5". Cut borders on two sides using delicate border basics die. Choose another pattern paper from the same collection and cut the edges of the pattern paper using classic border basics die. Matt it on the white cardstock. Layer it on the card base using dimensional tape.

Cut a pattern paper and a white cardstock  using eyelet oval die. Cut two borders from the white cardstock using elegant pockets accents die. Glue it on the backside of the oval die cut. Layer it on the center of the card base using dimensional tape.

Stamp vase images on the water color paper using black archival ink. Paint the images using zig markers and cut with coordinating die. Stamp the tulip flowers using plum archival and cut with coordinating die. Paint the flowers with tea rose and plum color. Shape the flowers using 3d flower shaping mold. Stamp the tulip leaves using olive green ink and paint with leaf green and then cut with coordinating die. Shape the leaves using Deluxe flower shaping kit.

Glue the vase as shown in the picture and arrange flowers in the vase. Cut a sentiment strip from the designer collection. Matt it on the white cardstock and glue it on the other side of the vase as shown in the picture. Cut a sentiment tag using ornamental tag die and glue it on the card. For the finished look glue a satin cord bow and apply glitter on the flowers using adhesive that dries clear.

Thanks for stopping by 
Hugs
Uma

Thursday 10 January 2019

Love: Mixed Media Layout

Hey Everyone,

Good Morning......

I am here to share you my inspirational post for Mudra Craft Stamp. This time I create a layout using Mudra's gorgeous chipzeb , stamp and stencil.
Here is it...

For step by step instructions and product list check my post on Mudra Craft Stamp Blog.


Hope you like 
Love


Participating in 
Allsorts Challenge Blog: Week 501 Hearts and Flowers 

Splashy Mix Challenge: Challenge #1 Anything Goes 

Dream Valley Challenges: Challenge #193 Anything Goes 


HLS January Mixed Media Challenge: Layers

Wednesday 9 January 2019

My Tulip Garden

Hey Crafty Folks!
Happy Wednesday..........

It’s time to shake off the wintertime blues and greet the spring season with the breathtaking Tulip Time Collection from Heartfelt Creations! Energize yourself with a beautifully hued paper collection filled with pastel pinks, pretty purples, sunny yellows and grassy greens…the ideal springtime colors for all of your spring themed paper craft creations! Graceful illustrations of delicate tulip bouquets, elegant flower pot arrangements, and colorful meadow like scenes garnish delicate backgrounds adorned in beautiful brocades, dainty lace like patterns and soft floral images, certain to put a spring in your step and a song in your heart! Rounding out this spring-inspired collection are three blossoming cling stamps sets displaying tender images of budding tulips, an assortment of flower pots ready to hold the first cuttings of the season, as well as a pretty picket fence ideal for building a cheerful garden scene! When paired with the coordinating dies, creating fresh and invigorating springtide embellishments for handmade greeting cards, scrapbook layouts and altered art pieces are accomplished quickly and with ease!  A fourth beautifully illustrated cling stamp set featuring breezy tulip petals in varying diameters, along with the coordinating dies and a customized Tulip Shaping Mold, will allow you to surround yourself with realistic replicas of the first flowers of spring! So, join us as we welcome the season of new beginnings with the Tulip Time Collection!
Here is my first take with this beautiful collection 


HEARFELT CREATIONS PRODUCTS:


HCD1-7218 Tulip Time Die
HCD1-7219 Tulip Bouquet Die
HCD1-7220 Tulip Vase & Fillers Die
HCD1-7221 Tulip Cart & Fence Die
HCPC-3858 Tulip Time Cling Stamp Set
HCPC-3859 Tulip Bouquet Cling Stamp Set
HCPC-3860 Tulip Vase & Fillers Cling Stamp Set
HCPC-3861 Tulip Cart & Fence Cling Stamp Set
HCDP1-298 Tulip Time Paper Collection
HCFB1-472 3D Tulip Shaping Mold 
Zig Markers
Black Archival 
Leaf Green
Olive Green
Sunflower Yellow Archival 
Vibrant Fuchsia 
HCD1-7213 Elegant Pocket Accents Die 
HCD1-7212 Petite Pocket Accents Die 

OTHER PRODUCTS:
Flower making paper , water color paper,  smooth white cardstock , glitter

VIDEO LINKS:
For more tips on creating with tulip time collection, watch the tutorial at 

INSTRUCTIONS:
Ready side fold card measures 8.25”×7” 
To create card base choose a pattern paper from the designer paper collection and cut a piece measures 8.25”×7”. Matt it on a white cardstock to create bendy frame , take a piece of smooth white cardstock measures 10.25”×7”. Score ½” on both side and cut a window using eyelet rectangle & basics die. Choose a pattern paper from the same collection and cut a piece measures 9.25”×7”. Cut a window from the pattern paper using same die. Matt it on the base frame.
To create window scene stamp some tulip flowers using vibrant fuchsia ink on flower making paper and cut with coordinating die. Color the flowers center using sunflower yellow ink. Color the edges of the flowers using vibrant fuchsia ink . Shape the flowers using 3d flower shaping mold. Stamp some tulip leaves using olive green ink. Paint the leaves with the leaf green ink and cut with coordinating dies. Shape the leaves using deluxe flower shaping kit. Arrange the flowers and leaves and keep it aside. Stamp some fillers , cart , fence & tulip bouquet using black archival on water color paper. Paint the images using zig markers and cut with coordinating die.
Glue the fence inside the bendy frame as shown in the picture. Glue flowers , tulip fillers and bouquets on the base card to create a window scene. Glue the frame on the base card as shown in the picture. Cut two decorative borders  from the  white cardstock using Elegant Pocket Accents Die  and glue it on the both side of the card. Cut two borders from the white cardstock using petite pocket accents die and glue it on the top of the frame. 
Glue the cart on the lower side of the frame and fill it with fillers and small tulip flowers. Cut a sentiment ticket from the same collection and matt it on the white cardstock. Glue a tulip bouquet and tulip flowers on the other side of the frame. Glue the sentiment ticket on the flowers using dimensional tape. Cut two tags from the same collection and tie it with satin cord. Matt the bendy frame on the side folded card base. For the finished look apply glitter on the flowers using glue that dries clear. 

Love

Saturday 5 January 2019

Memories Keeper

Hello Everyone!!!!

I am here with you, with my new inspirational post for Dadarkar Arts. This time I altered a round cardboard box using Prima's Lavander Frost collection, which is exclusive available on Dadarkar Arts.


First I take a round cardboard box and apply metalic color on the edges.


Choose designer paper from the Lavander Frost collection and cover the box using soft matt gel. Distress the edges using plum archival. Stamp the image on the side of the box using plum archival.


Apply gold metallic texture paste on the lid of the box using stencil.

Color a resin heart frame using metalic paint.


Now apply  gold texture paste on frame. Keep it aside. Take some leaves chipzeb and paint them with black gesso. Also brushed metalic paint and gold texture paste. 


Glue some paper flowers, chipzeb and heart as shown in the picture. Take a sentiment cutout from lavander frost collection and layer it on the white cardstock. Distress the edges of the sentiment using plum and glue it. 

Add some art stones using soft matt gel and glue 2 butterfly emblishment as shown in the picture. 


Hope you like it 
Hugs 


Participating in:


Wednesday 2 January 2019

Flowering Largesse

Hello Friends!!
Here is a gift bag using "Flowering Dogwood" collection.  It's a small bag perfect for any occasion. Give your love to your friends and family in your style. 


Heartfelt Creations Products used:
HCD1-7129 Flowering Dogwood Die
HCD1-7118 Delicate Border Basics Die 
HCD1-7119 Classic Border Basics Die 
HCD1-7154 Eyelet Circle &Basics Small Die 
HCPC-3773 Flowering Dogwood Stamp 
Sap Green Archival 
Leaf Green Archival 
Magenta hue archival 
Library Green Archival 
HCDP1-275 Flowering Dogwood Paper Collection 
HCD1-7203 Ornamental Tags Die 
HCD1-7201 Ticket and Tags die 
NU655 Nuvo Crystal Drops 
HCS1-459-3 Assorted Beads Stamens 
HCS1-458-2 Bright Pearl Stamens 

Other Products: 
Smooth White cardstock, White Satin Cord, Organza Ribbon, Pearl wire, Glitter 

Instructions
To prepare bag, first take 2 pieces of white cardstock measures 7”×8”. Cut the top edge using cdelicate border basics die. Score on 2” from the bottom side. Score on 11/2” and 51/2”. Cut the score part from both side. Also cut diagonally from the top to end. Fold the score part. Do same with another cardstock. Glue both from the bottom. Cut 2 pieces of white cardstock measures 3”× 6.5”. Score on ½” and 2.5” from longer side.  Also score on ½” from smaller side. Glue the pieces  on the both side of the bag. 
Choose pattern paper from the designer paper collection and cut 2 pieces measures 6”×7”.  Cut the top edge using classic border basics die. Mark on 1 ½” and 5 ½” on the bottom side.  Cut diagonally from the mark point to top. Layer them on both side of bag. Cut 2 pc of pattern paper measures 2”×6” for sides of bag.

For the handle , cut 2 rings using eyelet circle & basic small die from the designer paper and 2 pieces from designer paper. Glue them as shown in the picture. Stamp dogwood flowers on the flower making paper using leaf green archival and cut with coordinating die. Paint with same color and slightly with magenta hue ink. Shape the flowers using ball tool. Stamp leaves using library green archival and cut with coordinating die. Arrange flowers and leaves on the bag as shown in the picture. Cut a sentiment using die from the white cardstock.  I cut 5 times and layer them. Glue the sentiment on the bag. Cut 2 tags from the same collection and tie the with a cord . Tie this cord on the side of the bag. For the finished look apply glitter on the flowers using adhesive that dries clear.

Thanks for stopping by 
Hugs


Best Guy Ever

Hello Everyone! Good morning.... Today is Heartfelt Wednesday and I am back with another card using "Majestic Frames" die....