Showing posts with label Foamiran flower. Show all posts

Wednesday, 6 March 2019

Floral Tiara

Hello Crafty Folks....
Good morning...

Today I'd like to share a floral tiara with foam flowers.


PRODUCTS USED:
HCD1-7173 Small Sweet Peony Die
HCPC-3819 Small Sweet Peony Stamp
HCPC-3862 Cheery Pansy Stamp
HCD1-7222 Cheery Pansy Die
HCFS1-465 Art Foam Paper
Olive Green Archival
Leaf Green Archival
RACP-362 Buttercup Archival
HCS1-457-1 Pastel Pearl Stamens Smalls
159723 Designer Dries Clear Adhesive


OTHER PRODUCTS:
Handmade paper, green floral wire, green floral tape,  Soft matt gel, satin ribbon

VIDEO LINKS

INSTRUCTIONS
To prepare flowers, first stamp small sweet peony flowers on foam paper using buttercup archival and cut with coordinating die. Apply same ink on the center of the flowers. Shape the flowers using hot iron. Tie stamens on floral wire and add shaped flowers using designer glue. Create multiple flowers using big and small die. To prepare leaves, stamp cheery pansy leaves using olive green archival and cut with coordinating die. Color the leaves using acrylic color (dilute the paint using water). Shape leaves using shaping mold. Cut and glue leaves on floral wire using designer glue.
Cut strips of foam paper which is ¾” wide and 4”long. Color the strip using leaf green archival and cut thin slits on it. Heat and twist the slits. Glue these strips on floral wire using hot glue. Once all the elements ready keep them aside. Take floral wires and join them using floral tape and make that 26”long. Fold from one end and make a loop. Arrange flowers and leaves on the wire using floral tape. When finished with all arrangement make a loop on another end. Tie ribbons on the both loop.
For the finished look apply soft matt gel on the flowers and add glitter.

Thanks for stopping by
Regards
Uma

Tuesday, 6 November 2018

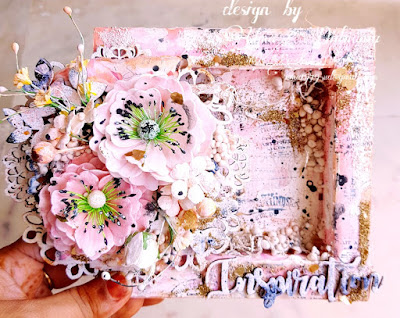
Blooming Flowers Shadow Box

Hello Crafty Folks!!
Good morning......
It's festival time and we all are busy in preparation for Diwali. What's new you are doing on this festival?
Today I have created a mixed media shadow box using Icraft supplies. All supplies are available on The Craft Studio .


Thanks for stopping by
Hugs
Uma

Tuesday, 2 October 2018

COOL BLUE CARD | GDT | ICRAFT

Hello Crafty Folks !! 

Good morning............:)

Today I am back with new creation. This is my first post of this month for the Icraft. I create this card using Icraft supplies.  Thanks to Foram Shah, who invited me as a guest designer for the month of October. 
Icraft is an Indian brand who have huge variety of craft supplies under one roof.  You can check their entire range here.  
So, here is glimpse of my today's post...


Icraft products used:
Silk Foamiran (White)
Silk Foamiran (Olive green)
Stamens
Fillers
Floral wire
Floral tape
Add on Element Sheet
Majestic Blooms paper collection
Flower Die

Other products used:
White cardstock
Royal Blue cardstock
Art stones
Small Talk
Lace
Circle Die
Micro Glass Fragments (Clear)


Instructions :
Ready top side fold card measures 6.5"× 6.5"
First take a white cardstock measuring 6.5"×13.5". Score on 6.5"and create a top side fold card. To prepare the card mats first choose a pattern paper from the designer paper collection and cut a piece measuring 6"×6". Also cut a royal blue cardstock measures 6.25"×6.25". Distress the edges of the pattern paper using a pair of scissors and layer it on the blue cardstock.  Layer it on the ready card base . Now take another piece of pattern paper and cut it diagonally . Also cut a diagonal piece from the blue cardstock. Distress the edges of the pattern paper using a pair of scissors and layer it on the blue cardstock.  layer it on the card using dimensional tape as shown in the picture. Glue a piece of white Lace diagonally as shown in the picture. 
Take white silk foamiran and cut it using flower die. Color the flowers with oil pastel colors.  Cut a circle frame from the white cardstock using circle die.  Glue it on the card. Twist and shape the flowers (Note: the quality of foam is too good , no need to heat it.). Create two flowers. Take olive green silk foamiran and create some leaves. Cut a round piece from the pattern paper using circle die and create a rose flower. Twist the floral wire and create some flourish. Fussy cut the flower and leaves from the Add on element sheet. Once all done I start arranging all elements.  Glue all the elements using hot melted glue as shown in the picture.  Fussy cut two birds from the designer paper and glue them. Apply soft mat gel and add art stones. Apply white gesso on the flowers and leaves using dry brush technique.  Add sentiment using foam tape to add dimension as shown in the picture.  Fpr the finished look apply clear glass fragments using adhesive that dries clear.


Hope you like it ......
Would love to hear from you........
Warm Regards....
Uma

Monday, 28 May 2018

Pretty pink card

Hello Crafty folks!!!

Good morning.........

Today I am back with pretty pink card. As you all know I love working with pastel colours. So here is one more card with pastel colors.  I love making flowers and these are handmade foamiran flowers. 


Would love to hear from you !!!!

Hugsssss.....

Uma

Saturday, 26 May 2018

Mummy's little girl

Hello Crafty Peeps!!!!
Good morning......

Today I'd like to share my layout with "Organza Foam" flowers, which is recently launched by "Dadarkar Arts". You can buy this foam from here. As you all know that foam flowers are so pretty and looks so real. Organza foam is very thin and give more real look to flowers. This is available only in white color. You can apply any color over it, like Archival inks,  Pastel colours, Gelatos and many more. No need to heat this foam, You can simply twist and create amazing flowers with this. If you have any queries about the organza foam you can freely ask me.

Here is my project:


Thanks for stopping by
Regards
Uma 

Saturday, 17 March 2018

Foamiran flower

Good morning friends!!!
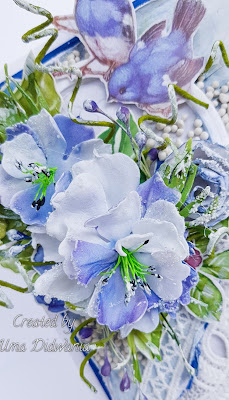
Once again I am here with beautiful foamiran flowers which I made with Gardenia die from mudra.  For these i use silk foam and archival inks. Isn't it pretty ????


Would love to here from you
Thanks for stopping by
Hugs
Uma

Sunday, 18 February 2018

Photo frame

Hello friends !!!!
Good morning.......
Today I'd like to share a photo frame with foamiran flowers. For the foamiran flowers I use silk foam and oil pastel colors . Stamens are also made with foamiran .


 Hope u like it..
Thanks for stopping by
Hugs....
Uma


Sunday, 16 July 2017

Foamiran flowers

Hello my dear friends
First I want to welcome u all on my blog.
Here u can get tutorial of my paper flowers, foam flowers, fabric flowers nd many more.
This is my first tutorial on my blog about foamiran flowers.
Today I have a tutorial for this beautiful flowers.


Now we start
1:   Cut the square pieces of white foamiran as shown in the pic.

2:   Cut the three edges of the square pieces into the curve shape as shown in the pic.

3:   Colour the edges of the petals wid archival ink pad or any other colour u have(like oil pastel, soft pastel, markers).

4:  Set ur iron on low temperature nd start heating the petals as shown in the pic .

5:  Heat the petal nd quickly twist it. Do wid all the petals .


6:  Now crush the kitchen foil and shape it like a rose bud.

7:  Attach a floral wire in the bud wid the help of hot melt glue.

8:  Now paste the small petals on the bud nd cover the kitchen foil bud.

9:  After finishing small petals ur flower looks like this.

10: Now start wid middle size petals nd then paste large size petals.

11: After done all steps ur flower look like this.

12: Now cut green foamiran nd mahe some leaves. Attach a floral wire in the middle of the leaves with the any strong glue . Here I use feviquick. And also make some buds.


13: Attach all of them with floral tape.


Hope u all enjoy this tutorial

Hugs


Best Guy Ever

Hello Everyone! Good morning.... Today is Heartfelt Wednesday and I am back with another card using "Majestic Frames" die....