Showing posts with label icraft. Show all posts

Wednesday, 16 October 2019

Tuesday, 6 November 2018

Blooming Flowers Shadow Box

Hello Crafty Folks!!
Good morning......
It's festival time and we all are busy in preparation for Diwali. What's new you are doing on this festival?
Today I have created a mixed media shadow box using Icraft supplies. All supplies are available on The Craft Studio .


Thanks for stopping by
Hugs
Uma

Tuesday, 23 October 2018

BIRTHDAY CARD

Hello Friends!!

Good morning......

It's Tuesday and it's time for another GDT post for ICRAFT. Today I create a card using super gorgeous products by Icraft.


Icraft Products used:
Majestic Blooms paper pack
Majestic Blooms Element sheet
Deckled Edge Paper
Stamens
Icraft flower die SKU 95020

Take a white raw cardbase and mat light purple cardstock on it. Choose pattern paper from the designer paper collection and cut a piece.  Mat it also on the cardbase.  Cut 2 arrow, 1 from purple cardstock and another from pattern paper and glue them using dimensional tape as shown in the picture.  Take a paper dolly and glue it. Create some flower using Icraft die and deckled edge paper. Glue the cheese cloth and arrange the flowers and chipboard cutouts.  Stamp a sentiment on the white cardstock using versafine ink and layer it on the purple card stock.  Glue the sentiment using dimensional tape as shown in the pic.  For the finished look apply white gesso using dry brush techniques and add arr stones using soft matt gel .


Thanks for stopping by
Hugs
Uma

Tuesday, 9 October 2018

BEAUTIFUL MEMORIES

Hello Everyone!!

Good morning .....:)

I am back with another card with Icraft products.  I already said that they have variety of products . Quality of products are too good. This time I use another paper pack of Icraft.  This is watercolor fantasy paper pack. Here is my card...


Ready top side fold card measures 6.5"×6.5"
To prepare the card mats first choose two pattern paper from the designer paper collection and cut a piece measuring 6.25"×6.25" and other one 6"×6". layer the first piece of designer paper which is 6.25" , on the ready card base.  Take second piece and distress the edges of the pattern paper using a pair of scissors . layer it on the card using dimensional tape as shown in the.  Tale some pieces of pattern paper from my stash and cut into small pieces . Distress the edges of the piece and glue it on the card using dimensional tape to create a wall effect as shown in the as shown in the picture. Apply texture paste on the piece of paper and leave it to dry for sometime.  Mist it with colors. Take a resin frame and glue it on a picture.  Layer the frame using dimensional tape as shown in the picture.  Create some flowers using Icraft dies and flower making paper . Arrange the flowers and other elements and glue them.
Cut 2 sentiment strip from the Icraft's Mayura collection and layer on the card. For the finished look glue green moss on the card to give the more natural look to the wall.


Hope you like it
Thanks for stopping by
Hugs
Uma

Tuesday, 2 October 2018

COOL BLUE CARD | GDT | ICRAFT

Hello Crafty Folks !! 

Good morning............:)

Today I am back with new creation. This is my first post of this month for the Icraft. I create this card using Icraft supplies.  Thanks to Foram Shah, who invited me as a guest designer for the month of October. 
Icraft is an Indian brand who have huge variety of craft supplies under one roof.  You can check their entire range here.  
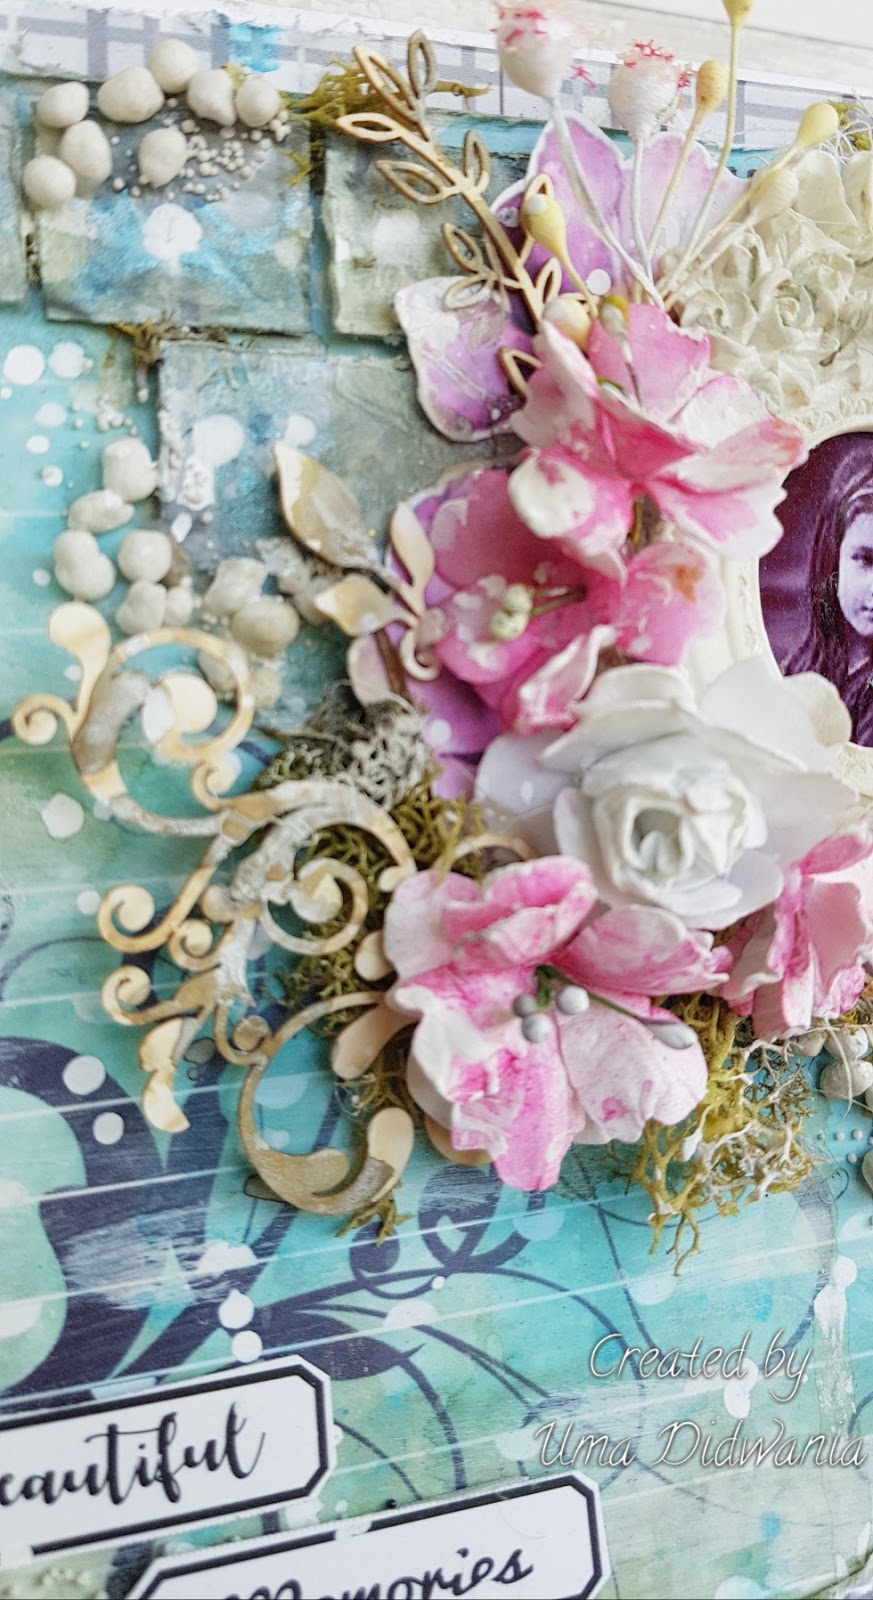
So, here is glimpse of my today's post...


Icraft products used:
Silk Foamiran (White)
Silk Foamiran (Olive green)
Stamens
Fillers
Floral wire
Floral tape
Add on Element Sheet
Majestic Blooms paper collection
Flower Die

Other products used:
White cardstock
Royal Blue cardstock
Art stones
Small Talk
Lace
Circle Die
Micro Glass Fragments (Clear)


Instructions :
Ready top side fold card measures 6.5"× 6.5"
First take a white cardstock measuring 6.5"×13.5". Score on 6.5"and create a top side fold card. To prepare the card mats first choose a pattern paper from the designer paper collection and cut a piece measuring 6"×6". Also cut a royal blue cardstock measures 6.25"×6.25". Distress the edges of the pattern paper using a pair of scissors and layer it on the blue cardstock.  Layer it on the ready card base . Now take another piece of pattern paper and cut it diagonally . Also cut a diagonal piece from the blue cardstock. Distress the edges of the pattern paper using a pair of scissors and layer it on the blue cardstock.  layer it on the card using dimensional tape as shown in the picture. Glue a piece of white Lace diagonally as shown in the picture. 
Take white silk foamiran and cut it using flower die. Color the flowers with oil pastel colors.  Cut a circle frame from the white cardstock using circle die.  Glue it on the card. Twist and shape the flowers (Note: the quality of foam is too good , no need to heat it.). Create two flowers. Take olive green silk foamiran and create some leaves. Cut a round piece from the pattern paper using circle die and create a rose flower. Twist the floral wire and create some flourish. Fussy cut the flower and leaves from the Add on element sheet. Once all done I start arranging all elements.  Glue all the elements using hot melted glue as shown in the picture.  Fussy cut two birds from the designer paper and glue them. Apply soft mat gel and add art stones. Apply white gesso on the flowers and leaves using dry brush technique.  Add sentiment using foam tape to add dimension as shown in the picture.  Fpr the finished look apply clear glass fragments using adhesive that dries clear.


Hope you like it ......
Would love to hear from you........
Warm Regards....
Uma

Best Guy Ever

Hello Everyone! Good morning.... Today is Heartfelt Wednesday and I am back with another card using "Majestic Frames" die....