Tuesday, 6 November 2018

Blooming Flowers Shadow Box

Hello Crafty Folks!!
Good morning......
It's festival time and we all are busy in preparation for Diwali. What's new you are doing on this festival?
Today I have created a mixed media shadow box using Icraft supplies. All supplies are available on The Craft Studio .


Thanks for stopping by
Hugs
Uma

Friday, 2 November 2018

Stamping Cards

Hello Crafty Folks!!
A very good morning to all of u...
 Today I kave some simple stamping cards with distress oxide background. Have a look...


Hope you like it..
Regards
Uma 

Thursday, 1 November 2018

Gift bag

Hello friends!
Good morning...
Here is another altered gift bag using mixed media techniques . 
To create this bag, first I applied clear gesso on bag. Apply texture paste using Mudra's stencil. Mist it with Lindy's color.  Glue some handmade flowers and chipzeb. Stamp sentiment on the black chipboard using versamark and heat embossed it with white embossing powder.  Glue sentiment using dimensional tape as shown in the picture. 


Thanks for stopping by
Hugs
Uma

Participating in:-

A Bit More Time To Craft

Wednesday, 31 October 2018

CAGED

Hello Crafty Peeps!!
Good Evening  ........

Today is inspirational wednesday. This time I altered a cage frame using mixedmedia techniques and Oakberry blossoms.


HC PRODUCTS USED:
HCPC-3842 Oakberry Lane Blossoms Stamp
HCD1-7200 Oakberry lane Blossoms die
HCPC-3839 Furry-Tailed Frolic stamp
HCD1-7197 Furry-Tailed Frolic Die
HCFB1-3D Blossoms Shaping mold
HCD1-7193 Leafy Accents Die
HCPC-3835 Leafy Accents Stamp
HCFB1- 467 3DLeafy Accents Shaping mold
HCDP1-288 Sweet Peony Paper Collection
RACP-482 Olive Green Archival
RACP-436 Leaf Green Archival
Sepia Archival
478455 Zig markers
HCS1-459-3 Assorted Bead Stamens Medium

OTHER PRODUCTS :
Cage Frame, White Gesso, Art stones , Acrylic paint, Opaque texture paste,  Dried moss ,Soft matt gel

INSTRUCTIONS :
Open the cage frame and apply thick layer of white gesso over it. Dry it and apply opaque texture paste.  Once it completely dry paint it using acrylic paints. Stamp the Oakberry Lane Blossoms flowers on the flower making paper using sepia ink and cut with coordinating die. Shape the flowers using flower shaping molds.  Stamp some leaves using olive green ink and cut with coordinating die. Paint the leaves using sap green archival and olive green archival.  Shape the leaves using shaping mold.

Stamp squirrels using black archival on water color paper.  Paint the squirrel images using zig markers and cut with coordinating die. Arrange the flowers, leaves and squirrels as shown in the picture. Glue dry moss inside the frame using hot melted glue.  Choose a pattern paper from the designer paper collection and cut a piece according to the frame. Glue it on the back cover of the frame. Glue some art stones using soft matt gel.  For the finished look apply sparkling dust on the flowers.


Hope you like it
Hugs
Uma

Participating in:-

Altered Eclectics

Monday, 29 October 2018

Altered Gift bag 3

Hello friends!
Good morning...
Today I have a altered gift bag to share with you. This is perfect for gifting bottles. 
First I applied clear gesso on the bag and apply texture paste using Mudra's stencil. After drying mist it with color bloom spray. Glue some piece of pattern paper from my stash. Again mist with color.  Glue cheese cloth and arrange handmade flowers and chipzeb.  Stamp the sentiment on the black chipboard using versamark and heat embossed it with white embossing powder.  Glue the sentiment using dimensional tape as shown in the picture.  For the finished look apply art stones using soft matt gel. 


Hope you like it....
Hugs
Uma

Sunday, 28 October 2018

BIRTHDAY EXPLOSION BOX

Hello Friends!!
Good morning....:)

Today I have a beautiful explosion box to share with you. I use Dress my craft's Floral Symphonypaper pack and handmade flowers.  Flowers created with gold shimmer cardstock. 


Thanks for stopping by
Regards
Uma

Wednesday, 24 October 2018

Pocket box

Hello Friends!!
Good morning. ...

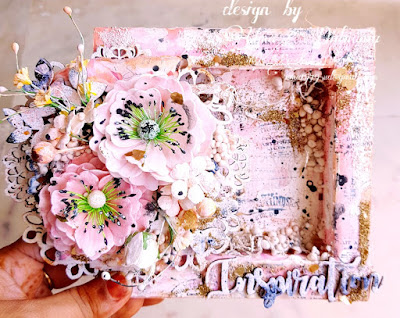
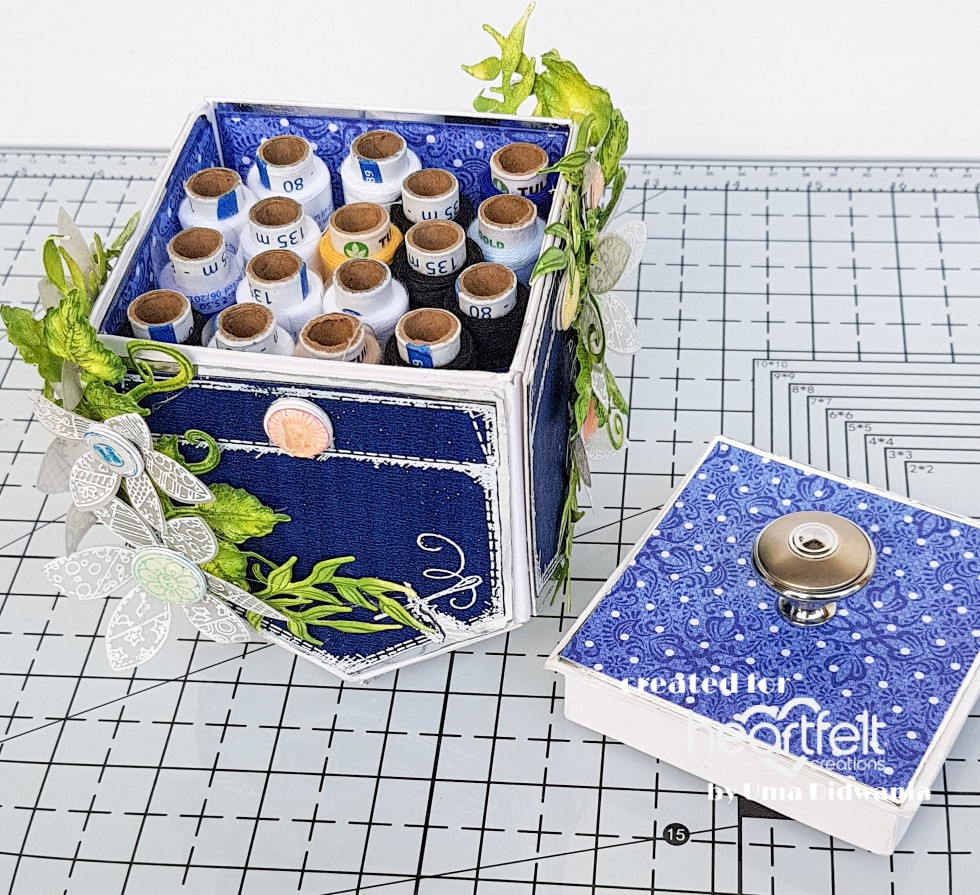
It's Heartfelt Wednesday and we have another inspirational project using Buttons and Blooms collection.  Today I have created a box using pocket die. This box is very versatile, you can use this for storing thread spools,  for gifting choclate and many more. Here is my box...


Products used :
HCDP1-295 Buttons and Blooms paper collection
HCPC-3849 Buttons and Blooms Stamp
HCD1-7205 Buttons and Blooms Die
HCD1-7206 Patchwork Pockets & Patterns Die
HCPC-3850 Patchwork Pockets & Patterns Stamp
HCPC-3811 Rain Boots and Blossom Stamp
HCD1-7169 Rain Boots and Blossom Die
HCPC-3835 Leafy Accents Stamp
HCD1-7193 Leafy Accents Die
HCFB1-467 Leafy Accents Shaping Mold
Olive Green Archival
Leaf Green Archival

OTHER PRODUCTS:
White cardstock, silver mirror cardstock, versamark, white embossing powder, Blue velvet cardstock, vellum paper,  Silver metal knob

VIDEO LINKS

INSTRUCTIONS:
Ready box measures 3.25”×3.25”× 4.5”
To prepare a box first take a piece of white cardstock measures 13.5”× 5.5”. Score and create a box according to the template.

Stamp 4 pockets on the blue velvet cardstock using versamark and heat embossed it with white embossing powder. Cut with coordinating die. Mat the pockets on silver mirror cardstock, 1/16” of an inch bigger on all sides. Glue it on the all 4 sides of the box. Cut a piece of white cardstock measures 3.25”×3.25”. Mat it inside of the box to create a flat surface.  Choose a pattern paper from the designer paper collection and cut 4 pieces measures 3”× 2.5”. Mat them on the silver mirror cardstock, 1/16” of an inch bigger on all 4 sides. Glue them on inside walls of the box. Cut a piece measures 3”×3” from the pattern paper and mat it on the silver mirror cardstock, 1/16” of an inch bigger on all sides. Glue it inside of box surface.
To prepare a lid take a piece of white cardstock measures 4.25”×4.25”. Score on ½” and 1” on all 4 sides and fold to prepare a small box. Take a piece of white cardstock measures 3.5”×3.5”. Glue the lid on it. Cut a pattern paper measures 3.25”×3.25” and mat it on the silver mirror cardstock,  glue it on the top of the lid. Arrange a knob in the middle of the lid.
Stamp flowers from  the Buttons and Blooms stamp on the vellum paper using versamark and heat embossed it with white embossing powder. Cut the flowers with coordinating die.  Stamp leaves from rain boots and blossoms stamp on the white cardstock using olive green ink.  Color with leaf green and olive green archival and cut with coordinating die. Also stamp some leaves from leafy accents stamp on the white cardstock using olive green ink and color them with leaf green and olive green archival and olive green archival.  Cut with coordinating die and shape them in shaping mold. Stamp some buttons on the white cardstock using different color archival and cut with coordinating die . Layer 5 buttons together of same size. Apply glossy accents on the buttons and let them to dry for sometime. Glue all the elements on the box as shown in the picture.


Hope u all like it
Thanks for stopping by
Hugs
Uma

Best Guy Ever

Hello Everyone! Good morning.... Today is Heartfelt Wednesday and I am back with another card using "Majestic Frames" die....