Wednesday 21 February 2018

Pls vote

Hello friends!!!!!

"PLS VOTE FOR ME"

The sun is shining bright in the sky...the flowers are blooming and spreading color, fragrance and love in the air.... Yess that's what I am feeling right now..... yayyyyy so Happy to share one of the most dear news of the day...I am selected as SEMIFINALIST for HEARTFELT creations❤❤...I am super excited right now and need immense support from you all today....To see me in Finals,pls vote on the given link....HEARTFELT thanks to all in advance for votingπŸ™πŸ™πŸ˜ŠπŸ˜Š

Here is the link:

https://www.heartfeltcreations.us/blog/672/springtime-inspiration-and-announcing-the-semifinalists

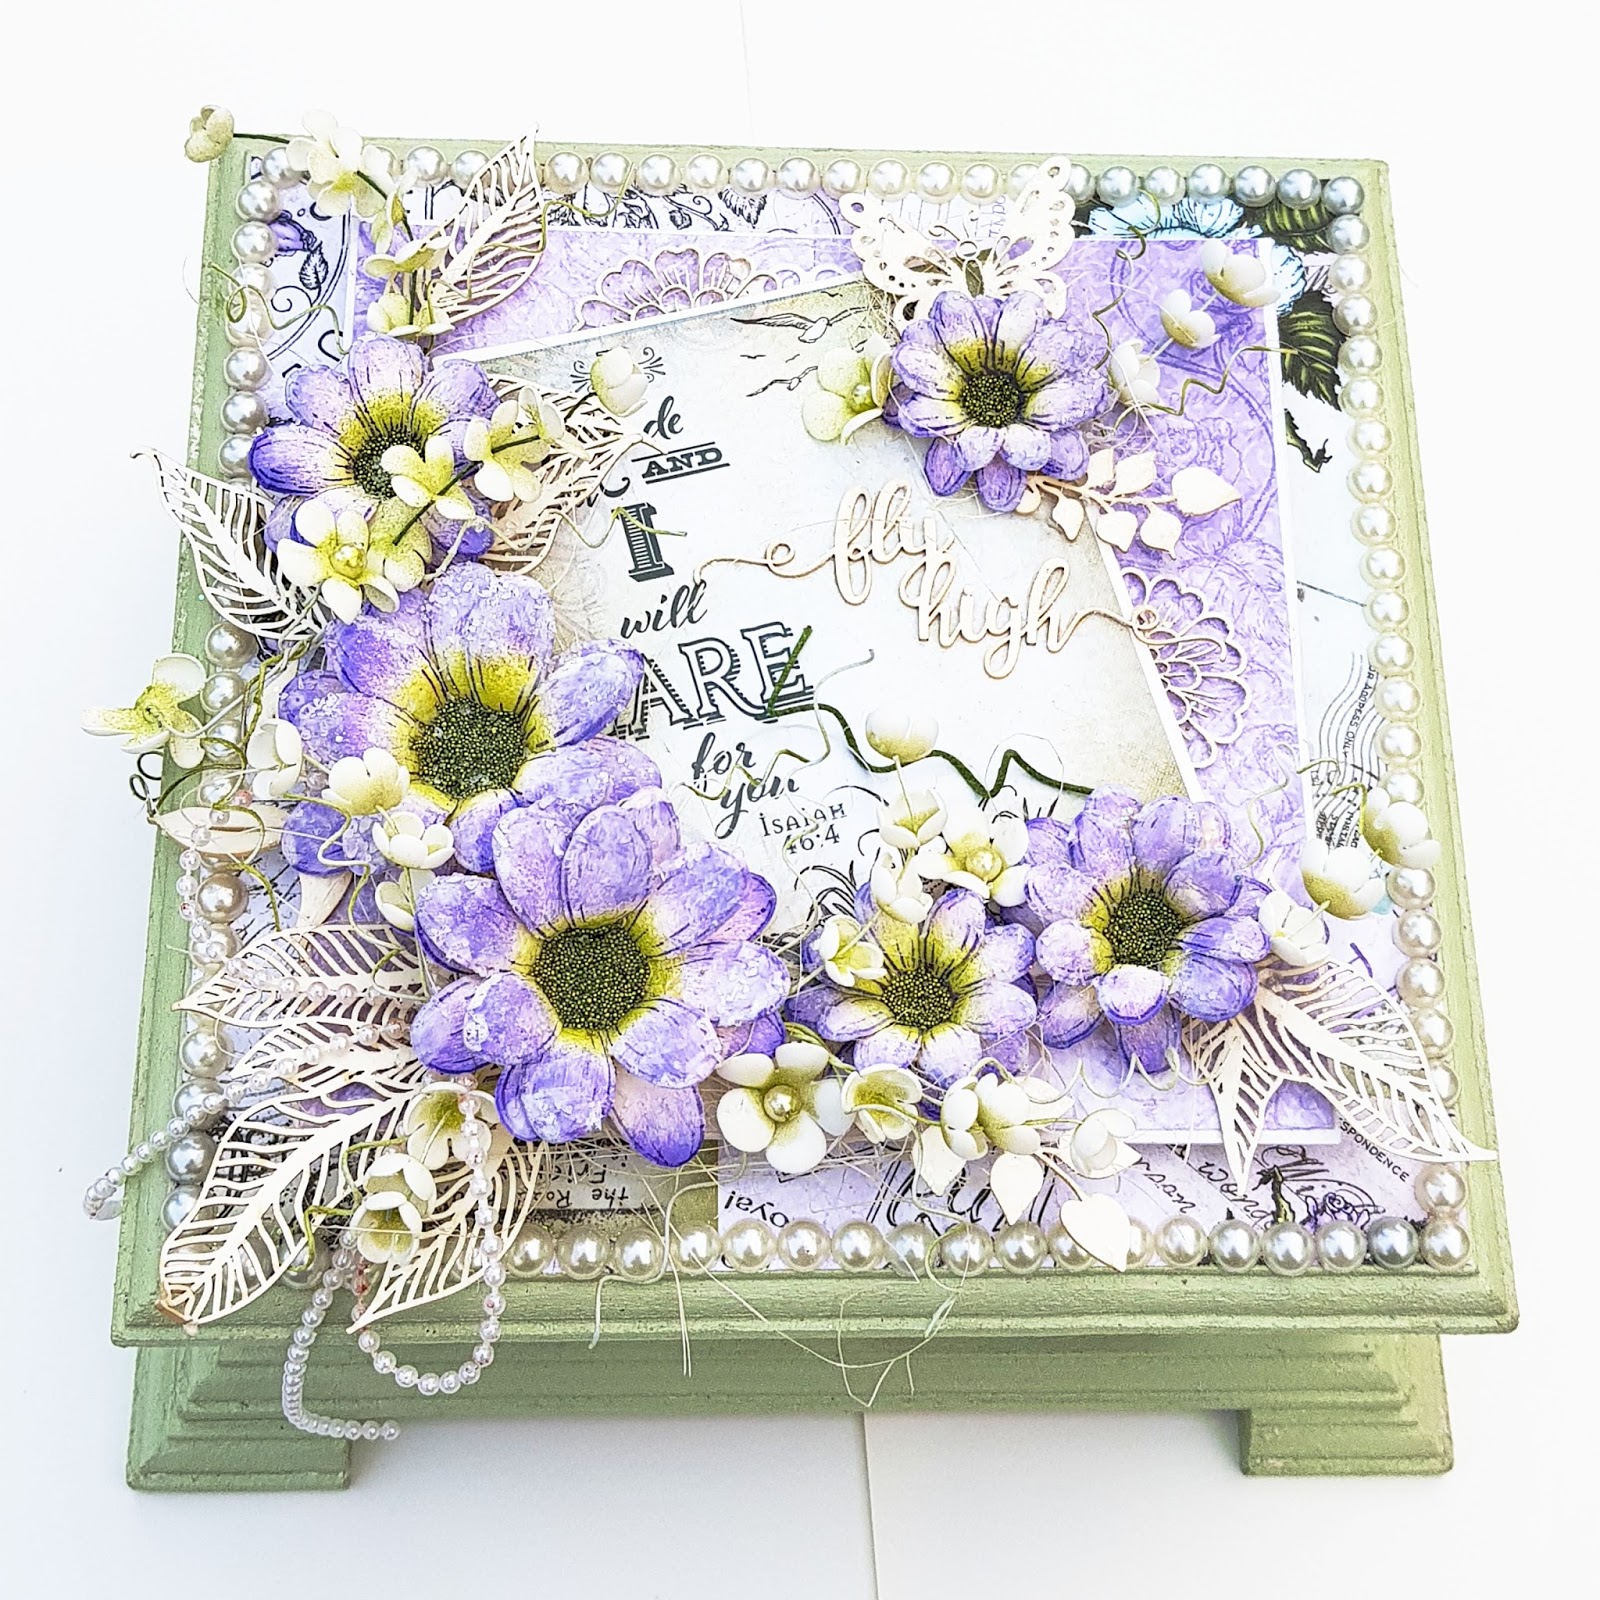
Here are my projects


Hugs
Uma...

Shabby chic alerted box


Hello Everyone
Today I 'd like to share an alerted box in shabby chic style.  For this box I use pattern paper from Heartfelt's Collection.


Product used:

Blushing Rose Paper Collection (HCP1-271)
Heartfelt Love Paper Collection (HCP1-284)
Delightful daisies stamp ( HCPC-3656)
Delightful daisies die ( HCD1-760)
Berry blossom die (HCP1-793)

Other products:
Mdf box
White chipboard
White cardstock
Foamiran
Archival ( deep purple/ fern green)
Stamens
Floral wire
Gesso
Modpodge
Acrylic paint
Chipzeb (Mudra)
Flat back pearl
Clear dries glue
Modpodge
Acrylic paint
Gesso
Double sided foam tape
Hot glue
Frosted sugar
Rajni Chawla's Frosting powder
Distress crackle paint (Clear rock candy)
Micro beads (Ranger)

Instructions:
I took a raw mdf of 8"×8" and applied gesso evenly. After drying I applied acrylic paint over it. Decopage the box using pattern paper from Blushing Rose paper pack . Then I took a white chipboard of 6"×6" . For the mating I find a purple pattern paper from the same collection. I adhered the chip board over the lid of the box using double sided foam tape and hot glue. Take a white cardstock 5"×3". For the mating take a card panel from love collection little smaller than the card base and adhere it.
 I stamped the flowers using delightful daisies stamp and deep purple onto the white card stock. Colour the flowers using same colour and die cut with cordinting die. Shape the flowers losing tool kit. For the center of the flowers I use micro beads from Ranger. For the foamiran fillers I use berry blossom die . Stuck all the flowers , floral fillers and chipzeb using hot glue. Applied light gesso over daisy flowers and dust frosted sugar . Applied the Distress Crackle Paint (clear rock candy) on chipzeb and sprinkle the Rajni Chawla's Frosting powder over it .
For the finished look I stuck some flat back pearls.

More close up pics:


Thanks for stopping by
Uma


Monday 19 February 2018

FAIRY SHADOW BOX

Hello friends!!!!
Good morning......
Today I 'd like to share my new project with Heartfelt Creation ( Singing in the Rain). The moment when I saw this beautiful paper pack the first thing which came in my mind was a Fairy Shadow Box...and here it is...!!!!


Product used:
Singing In The Rain Collection (HCDP1-286)
Rain Boots and Blossom Stamp (HCPC-3811)
Rain Boots and Blossoms Die (HCD1-7169)
Songs Of Spring Die (HCD1-7168)
Berry Blossoms Stamp(HCPC-3731)
Berry Blossoms Die (HCD1-793)

Other Products 
White cardstock 
Archival Ink ( Library Green , leaf green , fern green , pink peony , rose madder ) 
Memonto ( lady bug , grape jelly ) 
Clear dry glue 
Pop up glue dots 
Strip light 
DC connector


Instructions.....
Project size 7.5"×8.5"
Take a white card 12"×14". Fold and make the rectangular shadow box of 6"×8". Cut a pattern paper 4.5"×6.5" and adhere inside of the box. Cut 3/4" wide strips of pattern paper from singing in the rain and adhere on the sides of the shadow box with clear glue.
Arrange the strip light inside the box and dc connector for electricity connection For the frame card make a frame using white cardstock. Mat the pattern paper over it from the same collection. Glue panel on the card shadow box.  Locate preprinted images of rain boots, umbrella and fairy within paper collection that are sized to match the co-ordinating dies within the Singing in the Rain Collection. Die cut using big shot plus die cutting machine. Stamp the flowers and the leaves in the Rain Boots and Blossoms Cling Stamp Set onto white card stock using Archival Ink. Die cut using coordinating dies and color using Daubers using various color combinations of inks listed in supply list. Using Deluxe Flower Shaping Kit , shape each of the florals slightly. Stamp some small flowers from Berry Blossoms stamp onto white cardstock using Archival Rose Madder ink. Color using Pink Peony ink from Archival and shaped using tool kit. Once all the elements are ready, assemble inside the box using pop dots for dimensions as shown. Using Pop dots,attach both boots together to create a completed pair , cut slits in boots,work to arrange the bouquet and one satisfied with the arrangement ,use a glue that dries clear to adhere into rain boots . Using Pop dots, adhere rain boot arrangement to card front as shown. Cut a sentiment tricket from the same collection and adhere on the card with foam dots. For the final touches add some Crystal Clear Glitter on the flowers and leaves, using adhesive that dries clear..


Warm regards )
Uma

Entering in:

Creative Moments Challenge blog

Beautiful Moments layout

Hello friends!!!!!
A very good morning to all of u. .....
 Here is a layout with handmade flowers (heartfelt's classic rose) . Life is full of memories some good or some bad but some special moments in life are evergreen .


Products used:

. Blushing Rose Paper Collection (HCDP1-271)
. Classic Rose Stamp
. Classic Rose Die (HCD1-7110)
. Berry Blossoms Stamp ( HCPC-3731)
. Berry Blossoms Die (HCD1-793)
. Rain Boots And Blossoms Stamp (HCPC-3811)
. Rain Boots and Blossoms Die ( HCD1-7169)

Other products:

. White cardstock
. Archival ( vibrant fuchsia , library green , leaf green )
. Gallery oil pastel 204
. Stamens
. Floral wire
. Chipzeb sentiments
. Jute string
. Clear water droplets
. Lace trim
.Clear dry glue
. Hot glue
. Double sided foam tape
. Paper dolly
. Sparkling dust

Instructions:

Project size 12"×12"
For the base of the layout find a pattern paper from Blushing Rose paper collection. Adhered it on the thick chipboard. Find yellow pattern paper in same collection , tear the paper in wave form and adhered it on the base using double sided foam tape. Cut a card panel 6"×4" and for mating cut another card panel little bit smaller than the first. Find and cut out the 2 tags from the same collection and add burlap string to the top. Glue the card base on the left side of the layout using double sided foam tape as shown in the picture.  Mat a photo 4.5"×3" on the card panel. Add a lace trim . Adhere the tags on the right side of the photo. Stamp the flowers with Classic Rose Stamp and berry blossom stamp on the white cardstock using vibrant Russia color and cut with co-ordinating die. Color the flowers  with same colour and yellow oil pastel color. Shape the flowers without using any tools. Stamp some leaves with Classic Rose Stamp and Rain Boots and Blossom stamp using Libra green color and cut with co-ordinating dies. Color the leaves with leaf green color and slightly shape with ball tool . Twist some floral wires leaf green and made swirls. Arrange all the elements ( flowers,leaves,swirls )in desired manner. Add some glitter stamens. Glue some clear water drops using glue that dries clear. Glue a chipzeb sentiment using clear dry glue. Find and cut out the "Beautiful Moments with you" sentiment and butterfly from the same collection and glue on right side of matted photo. For the final touch add some sparkling dust on the flowers using adhesive that dries clear.

Here are some more close up pics :


Hope you like it . Would love to hear from you .
Happy crafting
Uma

Entering in
Lil patch of crafty friends challenge
Addicted to stamps challenge 
Stamping Sensations
Welcome to Crafty friends
The Crafty Addicts challenge blog 
Creative Inspiration
Stuck?! Sketches 

Floral Cards/Dt post for Mudra

Hii friends!!!
My DT post for Mudra Stamp  is up on blog today. I have shared three cards along with little instructions.  There are lots of photos to see the intricate details. 
I have used Mudra's beautiful stamps ,die and chipzeb chipboard 
Please click here to visit. Would love to see you there!!!


Don't forget to join our current challenge based on moodboard with vibrant shades of purple.
You can find all details here:


Warm regards )
Uma


Sunday 18 February 2018

Photo frame

Hello friends !!!!
Good morning.......
Today I'd like to share a photo frame with foamiran flowers. For the foamiran flowers I use silk foam and oil pastel colors . Stamens are also made with foamiran .


 Hope u like it..
Thanks for stopping by
Hugs....
Uma


Thursday 15 February 2018

Dome Card

Hello Crafty folks!!!!
Happy and excited to share that I'm on the Design Team of ''The Creative Crafters ''. It's a challange blog and they have a wonderful challange with lots of inspiration. Would be awesome if you try it out too, please do read the rules so your entries are eligible. It is an ANYTHING GOES CHALLENGE!! how cool is that, right???
I made a card for the inspiration post. It features Polkadoodles Stamps. To check out my card and also the beautiful inspiration by the DT, PLEASE CLICK HERE.
Here are the pics of my card.....


Hope u all like it ...
Hugs
Uma

Best Guy Ever

Hello Everyone! Good morning.... Today is Heartfelt Wednesday and I am back with another card using "Majestic Frames" die....